Imagine you’re in the midst of peak production. Material output is at its prime and systems hum along smoothly. But then a section of wire cloth breaks. The operation grinds to a halt until a technician completes the repair. It’s bound to happen at some point, but it will happen less frequently by checking some tell-tale signs.
Here are four steps to minimize downtime and promote a smooth operation:
Step 1. Ask an expert:
Most OEMs start diagnosing premature wear issues by examining an operation’s scrap pile. That pile of discarded screens holds clues to problems the screen media encountered, such as broken wires, wear areas, blinding, pegging and more. Each problem indicates specific issues that lead to premature wear, which help technicians determine why the section broke.
Screen Deck Bolts
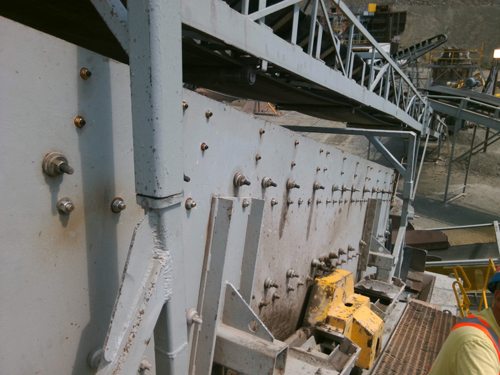
Regularly inspect the sideplates of the vibrating screen for signs of wear or cracking. These problems indicate improper screen size or installation.
Step 2. Check to see if the screen section has moved:
How do the hooks look on the screen sections? If there are shiny areas, it could be a sign that the section is loose and moving back and forth during operation. Also, ensure that the bar rail liner is in good condition and the tension rail bolts are tight. Consistently monitoring the torque helps determine the cause of some problems since improper tensioning leads to premature breakage. It’s also essential to look at the machine as a whole and take several aspects into consideration, such as if there is a bolt in every hole. Areas without bolts are susceptible to breaking.
Beyond checking the torque values, using the correct section size is vital on side-tensioned screens. To check, begin by measuring inside the vibrating screen from sideplate to sideplate. If the measurement is 72 inches, for instance, subtract 1.5 inches to determine the outside hook dimension. From there, measure the length of the tension rail and ensure the section matches that dimension.
Step 3. Look at the camber:
Check the camber on the screen deck and the bar rails for wear. On a double cambered deck make sure the center hold down is being used. The camber gives the section the down-and-out tensioning required to keep it in place. Every bar rail should be supporting the section. If the screens aren’t tensioned correctly or the center hold-down bar isn’t being used, breakage will happen sooner rather than later.
Step 4: Inspect the bar and tension rails:
Are they in good condition? It is important to ensure the bar rails are not worn. Even if you put new liners on a worn bar rail, they can’t support the section. Also, monitor the tension rails that hold each screen section in place. Worn or bent tension rails need to be replaced. If the rails are worn, speak with your OEM to have them replaced and avoid turning to local fabricators for the replacement. While cheaper, you’re sacrificing quality because local fabricators frequently use substandard material and can put the wrong bend on the rail, which shortens the sections life. Check, too, that the bar rail liners are in good condition and that no areas are missing, which also can lead to premature breakage.
Even if all of these steps are done correctly, there could still be a problem if the wrong screen media is being used for the application. Talk to your screen media expert to see if there is a better solution for your application.
At Haver & Boecker, we provide certified technicians who use our Pulse vibration analysis testing and on-site inspection of your vibrating machine and screen media as well as training to help a team learn the best way to install screen media. That combination will keep an operation running smoothly and minimize downtime. Call a Haver & Boecker certified technician today for assistance: 1-800-325-5993.
BackOur global network of experience allows us to solve the most unique problems.
Florian Festge, Haver & Boecker Managing Partner